Showing posts with label diy this. Show all posts

Sunday, April 29, 2012

Diaper Bag? Check!

Although I started the diaper bag WEEKS ago, I *just* got around to finally finishing it.  It was sitting without straps for the longest time (cue Billy Joel's sing here: oh, oh, oh, oh, for the longest time...). Sick of seeing it in it's almost finished state, today I got the straps attached!

After some debate and one failed attempt at a bag I started and decided wasn't the right shape, size or design,  I now have a perfectly simple and roomy diaper bag:

As you can see, I went for the grey exterior of my inspiration and a fun interior as planned.  I made a nice big zippered pocket on one side & on the inside I went ahead and used fusible vinyl.  The vinyl was pretty easy to iron onto the fabric-just follow the directions, but sewing it was a challenge. 


It's kinda tough to hold on to and because I used the vinyl to make the bag more water resisitant, I didn't want to put a lot of pins through it.  In some places I ended up using blue painters tape to hold things in place until I could stitch them down and then pulled the tape away.


The most difficult part was the elastic pocket, which is on the side of the bag at the bottom of the photo, so it's hard to see it.  Because of the vinyl, it was just more challenging than other elastic pockets have been for me in the past.

I also added a couple of heavy duty snaps on the ends of the bag to bring in the sides a little and if we need the extra space, a quick unsnapping will give it.  The magnetic snap almost perfectly matches the green of the space invaders fabric- I was really pleased when I found it because I was planning on either black or silver not knowing that lime green was even an option.


I have the fabric to make a matching changing pad w/ green PUL on one side so it will be easy to clean and also a draw-string pouch that will be easy to grab and take to a restroom for when we're out and about and baby needs to be changed.  I'm thinking some type of first aid kit would also be a great idea- perhaps a cosmetic bag since it's small, but would stay well organized.

And did I mention that the bag matches the new stroller and carseat?  Well, it does! (it's almost like I planned it that way!)

I'm hoping to post soon about painting... 

post signature
post signature

Tuesday, April 12, 2011

one of these thingsis not like the other

Notice how different the labels are on my bottles?

I actually used the same inkjet clear labels for both, but the "scrub" bottle went through a special treatment first. Turns out that the layer that is added to the labels to make the inkjet ink stick to them (but not make them water resistant) is *removable*!

Using some of my homemade cleaner & a scrubby sponge, I was able to get rid of that stuff & then ran the labels through my laser printer, thus making water resistant, clear labels!

Ok, so they aren't perfect, but they look pretty damn cool. I know that they will eventually need to be replaced, but by then I might even own a Silhouette and would be able to make something really cool.

By the way, if you are wondering and don't already know, the font is Pharmacy, which is easily down-loadable & although you can't see them, I typed the recipes on the back in good ol' Century Gothic- easy to read and a nice clean contrast to Pharmacy.

I'll get the cleaning recipes up soon...


post signature

post signature

Sunday, November 14, 2010

After: The Bathroom!

Although it's been finished for some time, I hadn't made it 'round to posting the "after" of the bathroom project. This week's CSI Project is Beautiful Bathrooms, so I thought that was the perfect chance to reveal the final product. There is a little bit of the process that I'll go back and mention later, but for now...

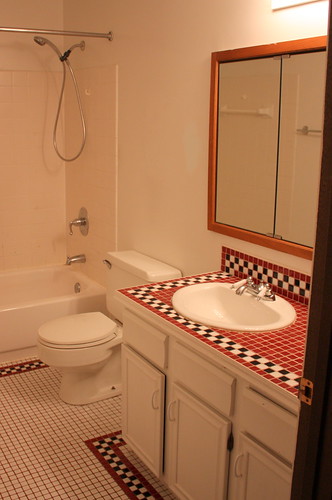
Remember the BEFORE?

Don't forget this is how it looked when we bought the house in 8+ years ago: (we painted before we moved in)

Well, here's the AFTER:

Big difference, huh? (long gone are the days of "The Fish Bowl")

For those who didn't follow the entire process, here's a quick run down of what we did.
Ripped out:
old vanity
all the old tile
old toilet
part of the wall down the studs around the tub
sub floor down the joists

& then we:
replaced the subfloor & put down cement board
replaced the removed portion of wall with cement board
replaced the vanity
replaced the toilet w/ a more efficient model
replaced all the tile
new countertop
new sink
new faucets
reused the towel bars
painted- Pittsburgh Paints Spring Rain
sewed a new shower curtain
purchased a couple of new accessories

Now for some fun photos:
Our beautiful Italian ceramic tile floor.

The new vanity with the Piedrafina marble countertop-it's a recycled product!

The hooks I stained to match the rest of the wood tones.

Ikea Limmaren bottles for lotion, face wash & soap, along with the back spash tile.Joe and I both have drawers now!
We love the new bathroom. It's calm and serene and the opposite of what it was before. It's a pleasure to end the day soaking in the tub. I think we achieved the spa feel we were going for. We also love not having to bathe in the wash tub- thank goodness we have a powder room or this project might have been the end of our marriage!

All totaled, I think we ended up spending around $1500 for the entire project, which considering we ran into unexpected problems, wasn't too bad. I'd budgeted $1400-$1600, so we did pretty well.

If you'd like to read more about how the whole project went down, please click on the "bathroom" label to the right and it will show you the whole process.

post signature

I'm linking to :

post signature

Monday, July 12, 2010

bathroom, getting closer

We're getting really close to having the bathroom done!

In addition, we're just barely over budget. When I say barely, I'm talking 13 bucks barely. That will change a little because we still need to purchase a sealer/enhancer for the natural stone tile & the grout and base trim, but we also have a couple of returns to make, so we'll come out pretty darn close to my estimates!

We should have everything in and beautiful by the end of the weekend. We're hoping to get the vanity and the toilet in tomorrow and then we'll be down to easy stuff like rehanging the towel bars.

I'm going to hold off on many more photos, mostly because I love a big reveal, but also since a lot of what's left is BORING. Here's one last progress shot:

This is a great pic of the wall color and the tub filled with the inspiration for the color. Yep, that's water, nothing special about it. We'd filled the tub so it was weighted when we caulked & this is the only photo I've been able to take that shows off the color of water in our tub at all.

You may be wondering why the wall is painted in that manner. It's because I only painted the areas that will be seen with the final paint & just primed the area under the vanity. Joe tried to convince me not to paint that at all, but I wanted it nice and clean under there & I think the white paint will help add a feeling of more light when I search for something. Above the white paint is where the backsplash tile is going, so it's better left unpainted.

I'm so excited!


post signature

Tuesday, July 6, 2010

bathroom, day 12?

I think this is day 12 without a fully functional bathroom. It's really getting old. No, it was old on Sunday, it's a real pain in the neck now.

Saturday, Sunday & Monday were spend working on the tiles around the tub. This went much more easily than it did with Joe on his own. I burned or buttered tiles and he placed them. I did place a couple of tiles just so we could keep making progress while he made cuts.

We saved all the cuts until the end. Joe did something really smart. He numbered each piece and each spot on the wall so Joe called the number of the next tile and I got it ready. It was pretty slick. Of course, setting the subway tiles in a brick pattern added to the number of cuts, but it looks so cool!

We did end up purchasing a wet saw because we would have spent more money renting one and not had the ability to to take our time.

On the 4th of July, we knocked off early and headed to the lake where we got engaged 10 years ago during the fireworks. I've always wanted a good photo of the fireworks to hang in our house & this year I decided to try taking some. I got a few good ones. I think I might blow this one up & frame it:

Monday, after we finally finished with the subway tiles, we had enough mortar left to place 6 floor tiles. I also got the cutting in done with the final paint color. Spring Rain by Pittsburgh Paint. It's tough to tell in photos because it's really pale green and the blue painters tape reflects the light onto it, but it's exactly the color I was seeking. I wanted something reminiscent of the color water appears to be in a clean white bathtub.

Tonight, we finish setting the floor tiles!

I can't show you the view from the other end of the bathroom because we can't walk on the tiles; we finished setting them about 25 minutes ago.

I really can't wait to take a real bath again- the wash tub in the basement really isn't a good substitute!

post signature

Friday, July 2, 2010

I knew it would happen

Today, Joe and I reached the point in the bathroom project where we want to kill each other. It was somewhat inevitable.

He's cranky because although it looks great and I think the tile is holding just fine, he thinks it's a crap job and that it will all come crashing down in the middle of the night because he doesn't know what he's doing.

I'm cranky because I was at work all day and when I came home to paint some more he neglected to tell me that he hadn't feathered the dry wall seam mud, so I yelled at him for not mentioning it.

Oh, and the anniversary of our engagement is Sunday, so yeah, married life at our house is just a bowl of cherries right now.

post signature

Thursday, July 1, 2010

more bathroom fun!

After work yesterday, I came home to cement board on the walls. Joe did a really great job cutting the holes for the faucet.

After quickly changing clothes, I started sanding the repaired areas of the walls. YUCK! what a nasty task! As much as I hate wearing a dust mask, I had to. In the process, we found a few spots that we had to hit with another coat of dry wall compound, so although I really really hoped to be able to paint, it wasn't meant to be.

We also came to realize that the bathtub is slightly arched. Every one of the corners is lower than the middle of each side. This lead me to Facebook my friend who tiles things professionally and ask his opinion. He gave me great advice and that slight crisis was averted.

Tonight, I found that Joe had put down the floor cement board. Doesn't it look nice? It It's starting to look like a livable space again, almost.

I also learned about these cool rings that are available to bring the toilet flange to the correct height. For our tile, we needed 2. Notice that we actually remembered to place the new bolts for the toilet before it was too late- I'm particularly proud of that.

I did a quick paint job of white to prime the repaired areas of the walls and I'll likely end up lightly sanding (oh, joy, my favorite!) after a second coat. I really can't wait to get the real color on the walls. (By the way, an old shower curtain liner makes an excellent drop cloth!)

post signature

Wednesday, June 30, 2010

Are you a contractor?

No, but I did stay at a Holiday Inn Express last night! (more on that later)

Tuesday, Joe picked up the floor tiles from his co-worker and got rid of some of the big trash. He also got some the cement board cut for the bathtub area, but realized once he started to install it that because that’s a community wall between our house and the townhouse next door, the dry wall was is ¾ inch and the cement board is ½ inch. Luckily, the cement board has a much higher fire rating than that of drywall, so we can use dry wall shims. Only problem is that the Home Depot near us doesn’t carry dry wall shims! I even asked at the contractor desk and he was surprised that they didn’t have them.

We weren’t in a mood to go to a further away Home Depot, so, instead of putting up the cement board, we skim coated the parts of the dray wall that were damaged when we pulled off the tile. The largest portion of this will be covered with our backsplash tiles or baseboard, but we want the edges to blend nicely into the main part of the wall.

Then we called it a night early and headed to the Holiday Inn Express for a little R&R. I’d received a voucher for a night’s stay through an event & thought this was a perfect time to use it! We swam in the pool and sat in the hot tub, ate Culver’s custard & just hung out. We both felt better after having the chance to get really clean.

post signature

Monday, June 28, 2010

bathroom, bathroom, bathroom

That's all I've been living & breathing since Friday.

Ok, I went to work and managed to not think about it there, but once home, you know where I was.

We set in the new subfloor tonight and I removed all the caulk from the tub. *Tip: WD-40 works really well in helping to remove all the residue. It will also get you kinda high.

After finishing that up, I started prepping the walls for repairs. Lots of wholes to fill and places where the drywall is in disrepair.

There's not much to take pictures of tonight, so this is rather uninteresting visually, but I'm too exhausted to care.

post signature

Sunday, June 27, 2010

bathroom demo!

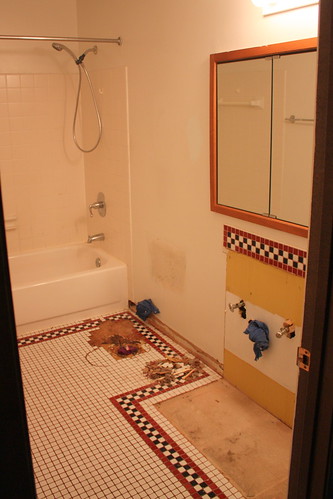
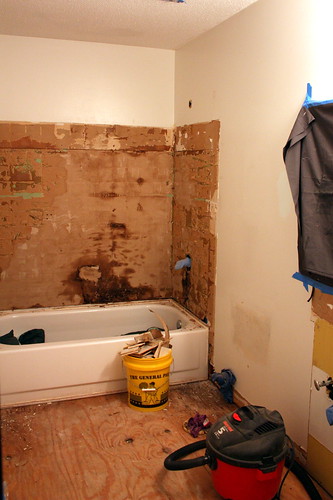
When I left for work on Friday, our bathroom looked like this:
After leaving work Joe & I stopped at Menards and Lowes to compare tile prices & a buy a couple of tools. I also learned that the way our bathroom was put together was somewhat shoddy. Joe told me about the plywood-plastic sheet-particle board sandwich onto which the mosaic tile was GLUED! No thin set, just glue and then the tiles were mortared to the walls, the vanity and the tub! Eek! When we returned home that evening, I found that Joe had removed the vanity, toilet & some floor tile & sub floor.

Saturday morning we took a break from demo and went countertop shopping. We went to Stone Countertop Outlet in Albertville. We looked at pre-cuts of granite, but decided on a beautiful quartz product called Piedrafina. Our counter will be "Bianco". The really cool thing about Piedrafina is that it's similar to Cambria, but it's made up of marble bits. It's about 95% pre-consumer recycled product that would otherwise be thrown away. It's perfect for a bathroom, but not a great choice for a kitchen or laundry since it doesn't stand up to lots of abuse. This was our big splurge item at $450. I'd budgeted $500.

We also made a Menards run, this time with a list of things we needed to buy. Sponges, bucket, paint rollers, paint (mail in rebate!), Misc tools stuff.

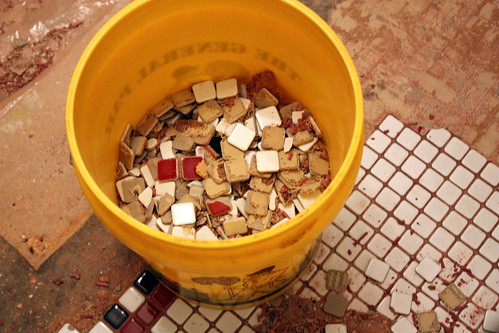
We came home and started breaking out tile. And breaking out tile and breaking out more tile. (man, I hate that tile!)

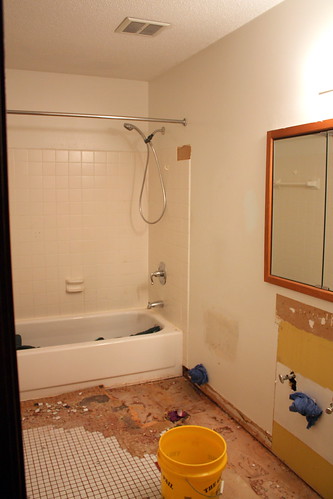
Since we live in a townhouse and have shared walls on 2 sides of our house, we knocked off making tons of noise about 8:00 and watched part of an NCIS marathon. We went to bed with the bathroom looking like this:


Sunday, we got up, ate some waffles (from scratch, thank you very much) and ran to Home Depot (notice, this is the 3rd home improvement store we've visited, (4th trip counting 2 different Menards)). We returned a tile we don't need and purchased a circular saw, which I thought we already owned, but apparently we didn't.

Came home, cut the rest of the upper sub-floor out and discovered bigger problems. The plywood lower sub-floor is only 1/2 inch, it should be at least 5/8 inch. We also discovered that the way the walls were built is weird. Thank goodness I built in $100 into the budget as a safety misc. fund! We'll be replacing the sub-floor. (oh, joy!)

While Joe was figuring out what, exactly, they did when they build our house, I pulled down the shower tiles. These were also glued. Being larger tiles, they came out much more easily and without nearly as much swearing.

After that we ran to Lowes & Home Depot (visits to store 6 & 7) and brought home the tile for the tub/shower. Nothing exciting here, just white subway tile purchased at Depot. I know a lot of people are using subway tiles and it's almost become a cliche, but its pattern reminiscent of our backsplash and I like the classic look.

After dinner, we cut out the drywall around the shower/tub, sucked up all the drywall dust and at 8:00 called it a night.

Here's what will waiting for us (and by "us" I mean Joe, since I'll be at work) Monday morning:

There are more photos on flikr!
post signature

Tuesday, June 1, 2010

FREE paint!

Glidden is giving away free paint testers (until they "run out")

You can get 2 & send a friend a link to get 2!

Just visit here: Glidden

I'm getting some samples for the bathroom!

post signature

Sunday, April 25, 2010

PAINT!

I'm really into silver spray paint. Like, really a lot into it.

I already posted the lamp that was sprayed and now some other things I updated with the same can of paint.

Some before and after photos:

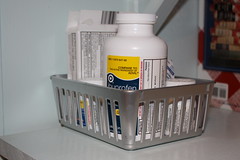
1.

I've had this little plastic basket forever, I've used it to hold about a million different items. Now, it looks great in out kitchen holding over-the-counter meds.

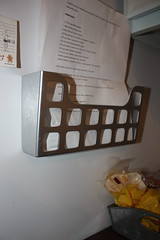
2.

This plastic bin was 30 cents at Unique Thrift- it has a magnet on the back & they had 2 of them stuck together for 60 cents, I gave the other one to my mom. I put the freshened bin on the fridge to hold often used recipes.

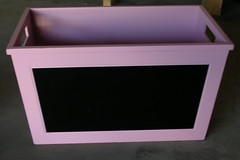
3.

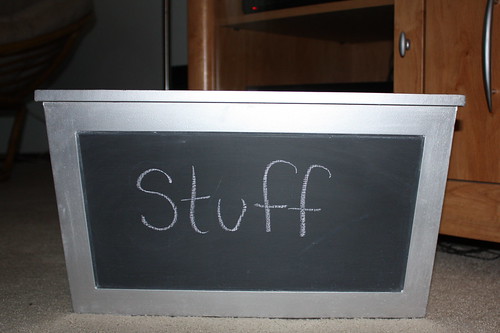
This storage bin is from the same trip to Unique as the purple bin. It was originally from Target- I scored it for $3. It looked like it had a chalkboard, but it was really only black paint. With the silver spray paint, some chalkboard paint and felt on the bottom, to prevent scratches, it's now holding stuff on the shelf of our coffee table.

I'm off to frost cupcakes and search for the perfect way to make a new camera bag...


post signature

Related Posts with Thumbnails